
Creating your own Christmas decorations adds a personal and heartfelt touch to the holiday season. This collection of 24 DIY Christmas decor projects offers a range of ideas, from rustic natural elements to modern minimalist designs, ensuring there is something for every home and skill level.
Whether you are looking to craft a centerpiece, a wall hanging, or a simple ornament, these projects are designed to be achievable with common materials and basic tools, allowing you to fill your space with handmade charm without the need for expensive store-bought items.
Craft a Rustic Pinecone Christmas Tree Centerpiece
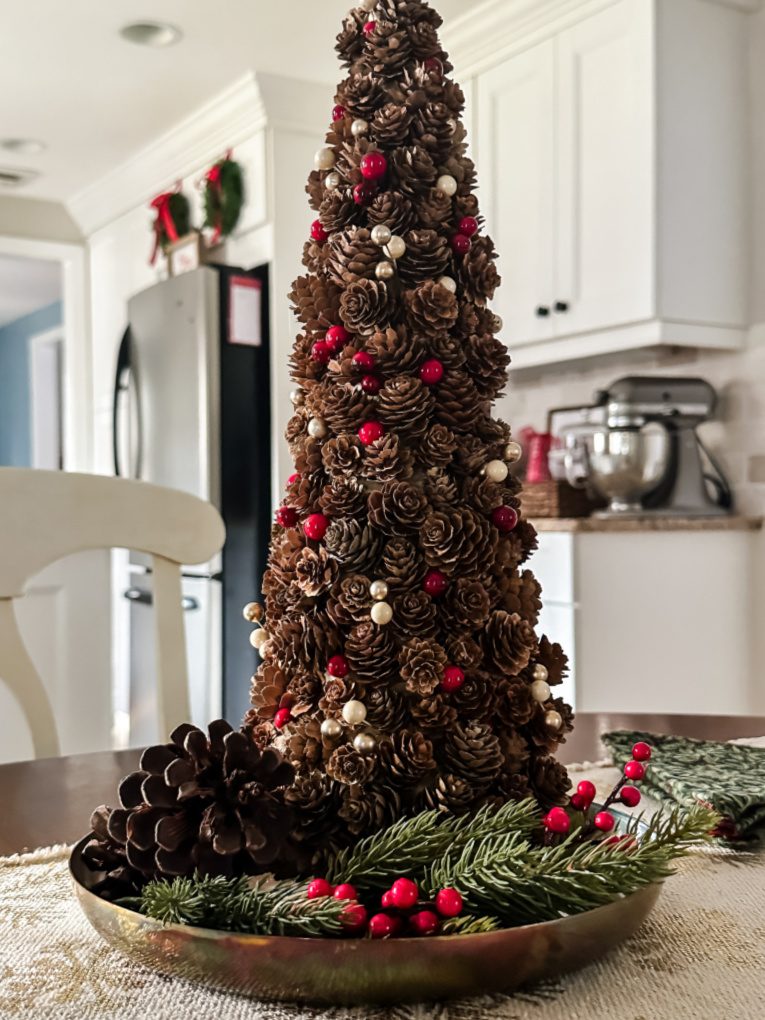
There’s something undeniably charming about a centerpiece that looks like it was plucked straight from a winter woodland. This cone-shaped DIY pinecone Christmas tree centerpiece sits compact on a table, built entirely from layered pinecones and anchored by a wood base and a metal bowl. Red berries and sprigs of greenery break up the brown, while cream-toned accents keep the palette from feeling too heavy. Natural light during the day catches the textures, making it feel handmade and honest. It’s a simple layout that lets one hero element shine without crowding the table.
Assemble a Miniature Winter Scene Display
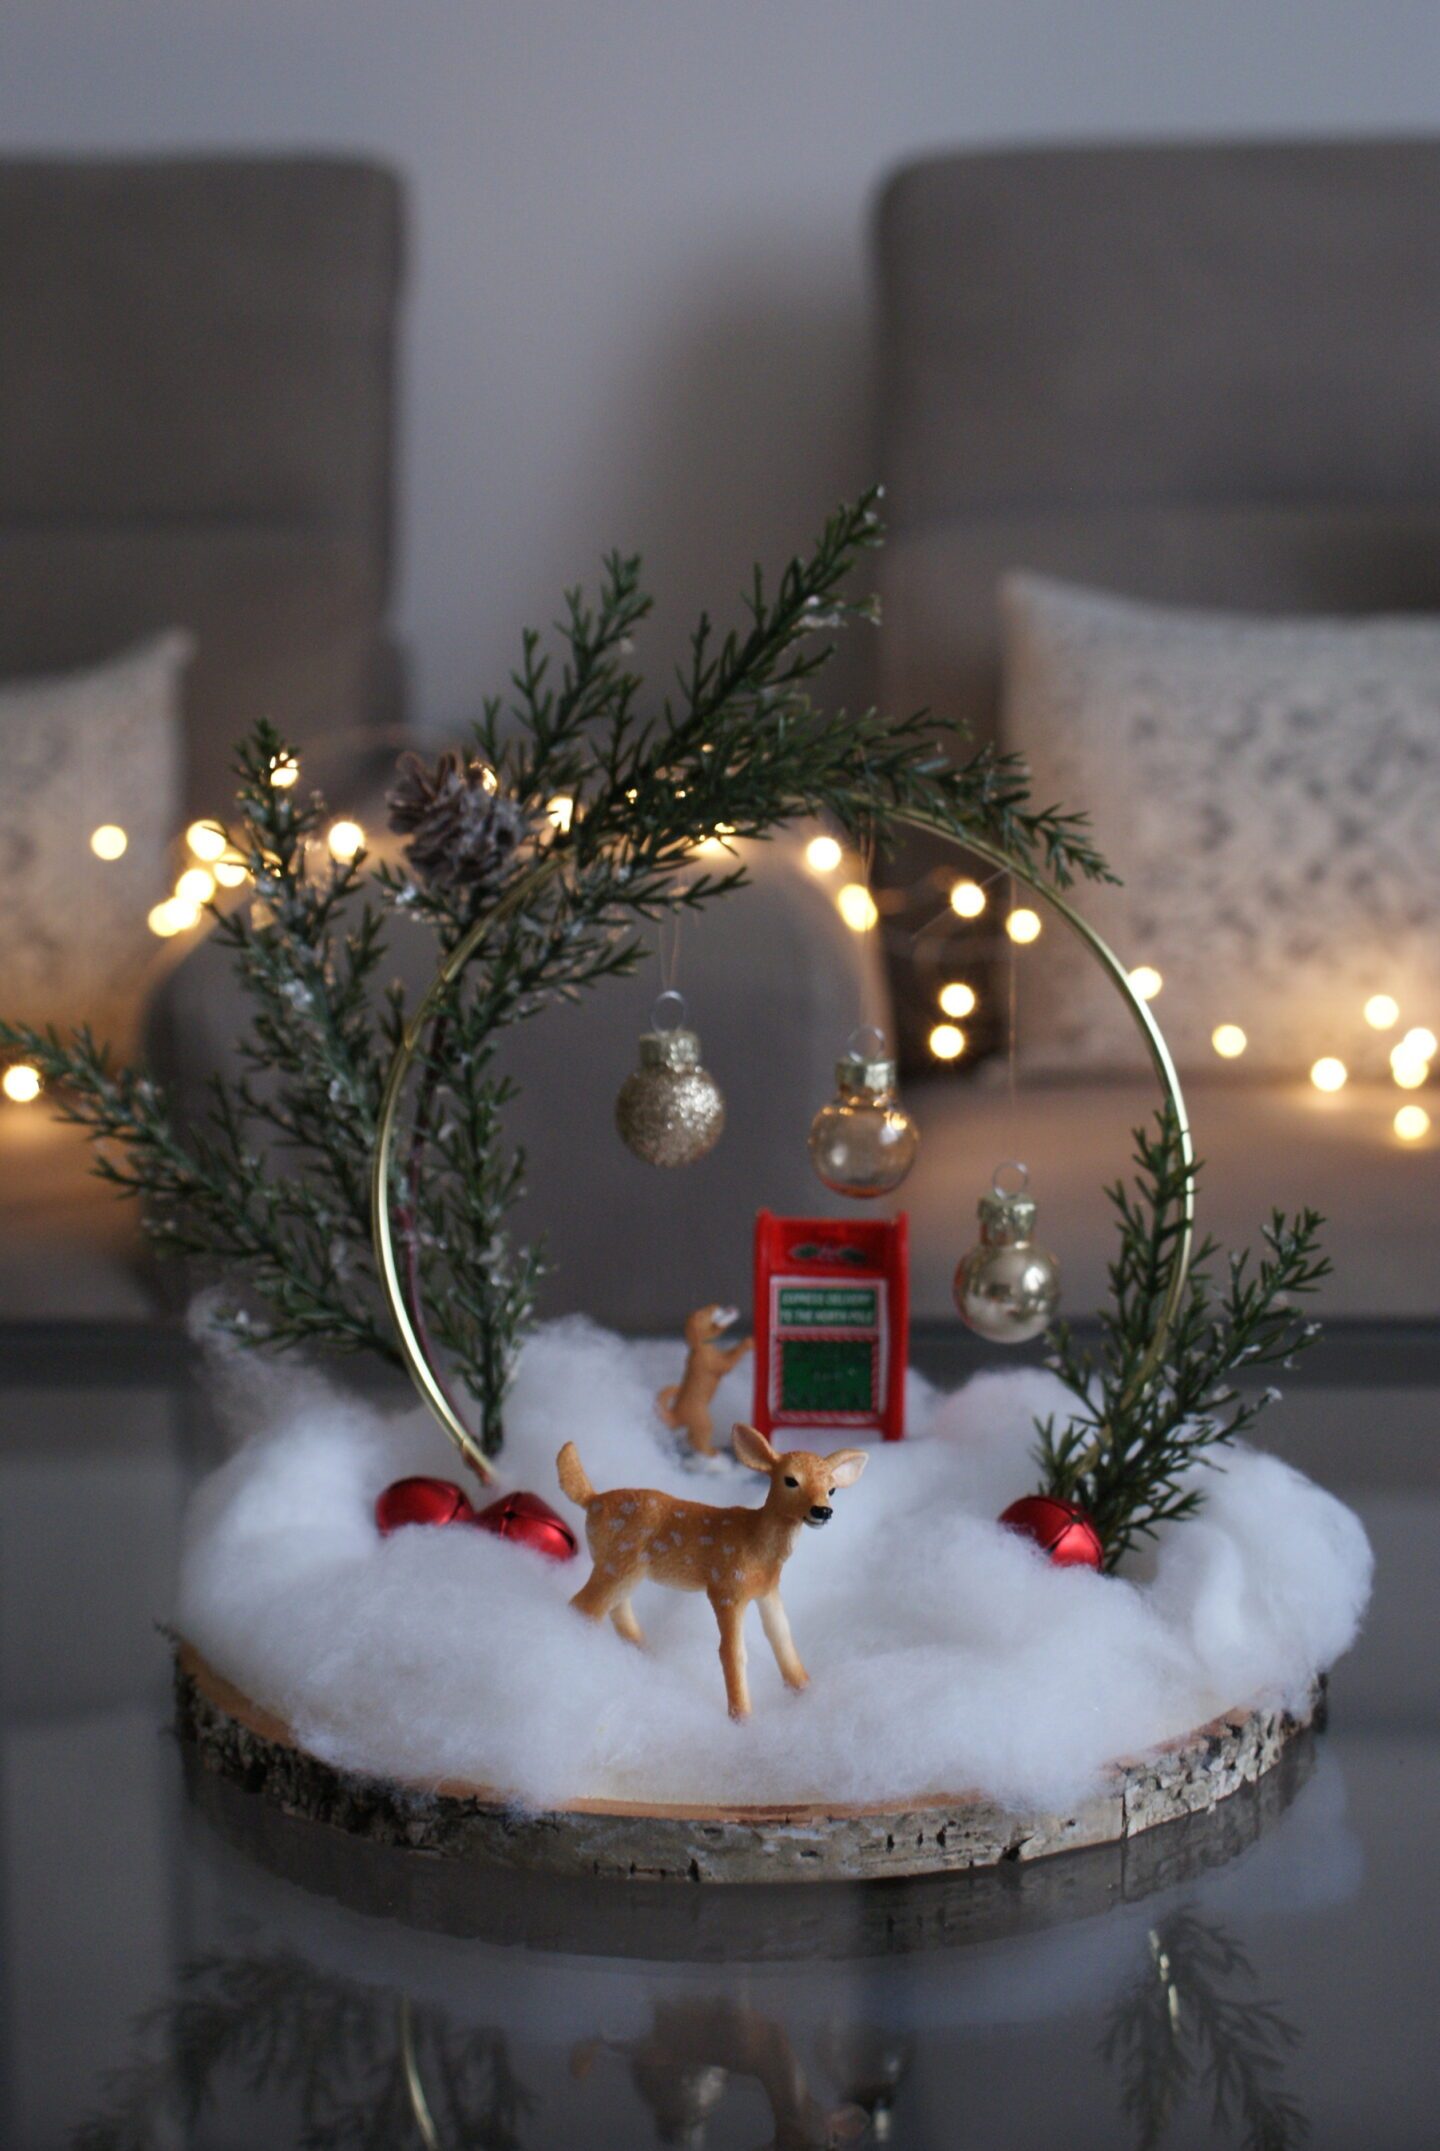
I’ve always been a fan of tiny worlds, and this DIY miniature Christmas village scene might be my favorite yet. A wood slice base keeps the whole thing grounded, while a circular frame wrapped in greenery holds faux snow, tiny deer figures, red ornaments, and gold baubles. Fairy lights in the background add that soft glow without overpowering the vignette. It reminds me of building snow villages as a kid, but this version feels more curated — the mix of natural materials and metallic accents keeps it from tipping into clutter. The whole setup proves you don’t need a lot of space to create a moment that feels complete.
Illuminate Your Space with Modern Ceramic Christmas Trees
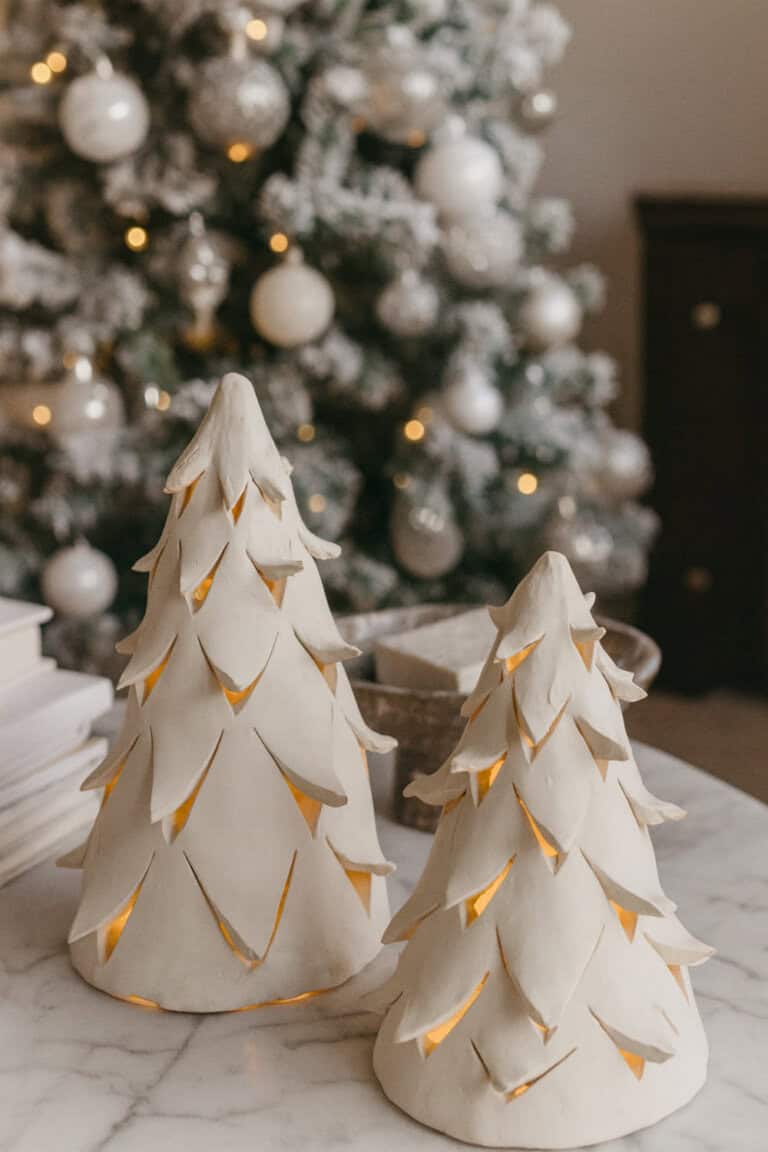
The mistake most people make with ceramic trees is treating them as mere ornaments rather than light sources. When placed on a bare shelf, they get lost. The trick is to let their internal warm glow become the focal point by setting them on a reflective surface like marble. Two off-white trees, compact in size, sit together on a marble tabletop in this vignette. The soft ambient light bounces off the stone, doubling the warmth and making the room feel layered without adding clutter.
To dodge the flat look, pair them with nothing else on the surface — let the glow do the work. The warm yellow light from inside the ceramic bodies creates a modern silhouette that feels both nostalgic and fresh. It’s a lesson in restraint: one strong material and one light source can carry a whole corner. Keep the palette minimal, and the trees become the quiet heroes of the room.
Create Festive ‘JOY’ Candle Holder Decor

Why settle for a single candle holder when you can spell out a message? This DIY JOY Christmas candle holders set takes the seasonal grouping one step further by arranging three matte black vases in a row, each topped with a red letter, pine sprigs, small bells, and a strip of buffalo check ribbon. The warm day light softens the contrast against the white shelf. Layout matters here: lining up the holders creates a clear focal point and turns a simple word into the centerpiece of a shelf display.
Hang an Intricate DIY Paper Snowflake Ornament

I’ll confess, cutting paper into something that looks delicate takes a steady hand and patience. This DIY paper snowflake Christmas ornament suits anyone who enjoys folding and snipping with intention, and has a tree branch ready for a large, airy focal piece. The white paper catches soft ambient light, and burlap ribbon ties it simply to the green needles. The folded paper creates a symmetrical pattern that stands out against the tree’s backdrop. The contrast between white paper and green needles draws the eye naturally. If you prefer ornaments that come out of a box ready to hang, or you’re short on time, this one may test your nerves. The detailed cuts require focus, but the payoff is a unique, intricate piece. Skip it if you want your tree done in ten minutes or if small fingers might reach it. As a decor principle, using paper keeps the tree safe from scratches and the budget flexible.
Construct a Recycled Metal Lid Christmas Tree Wall Hanging
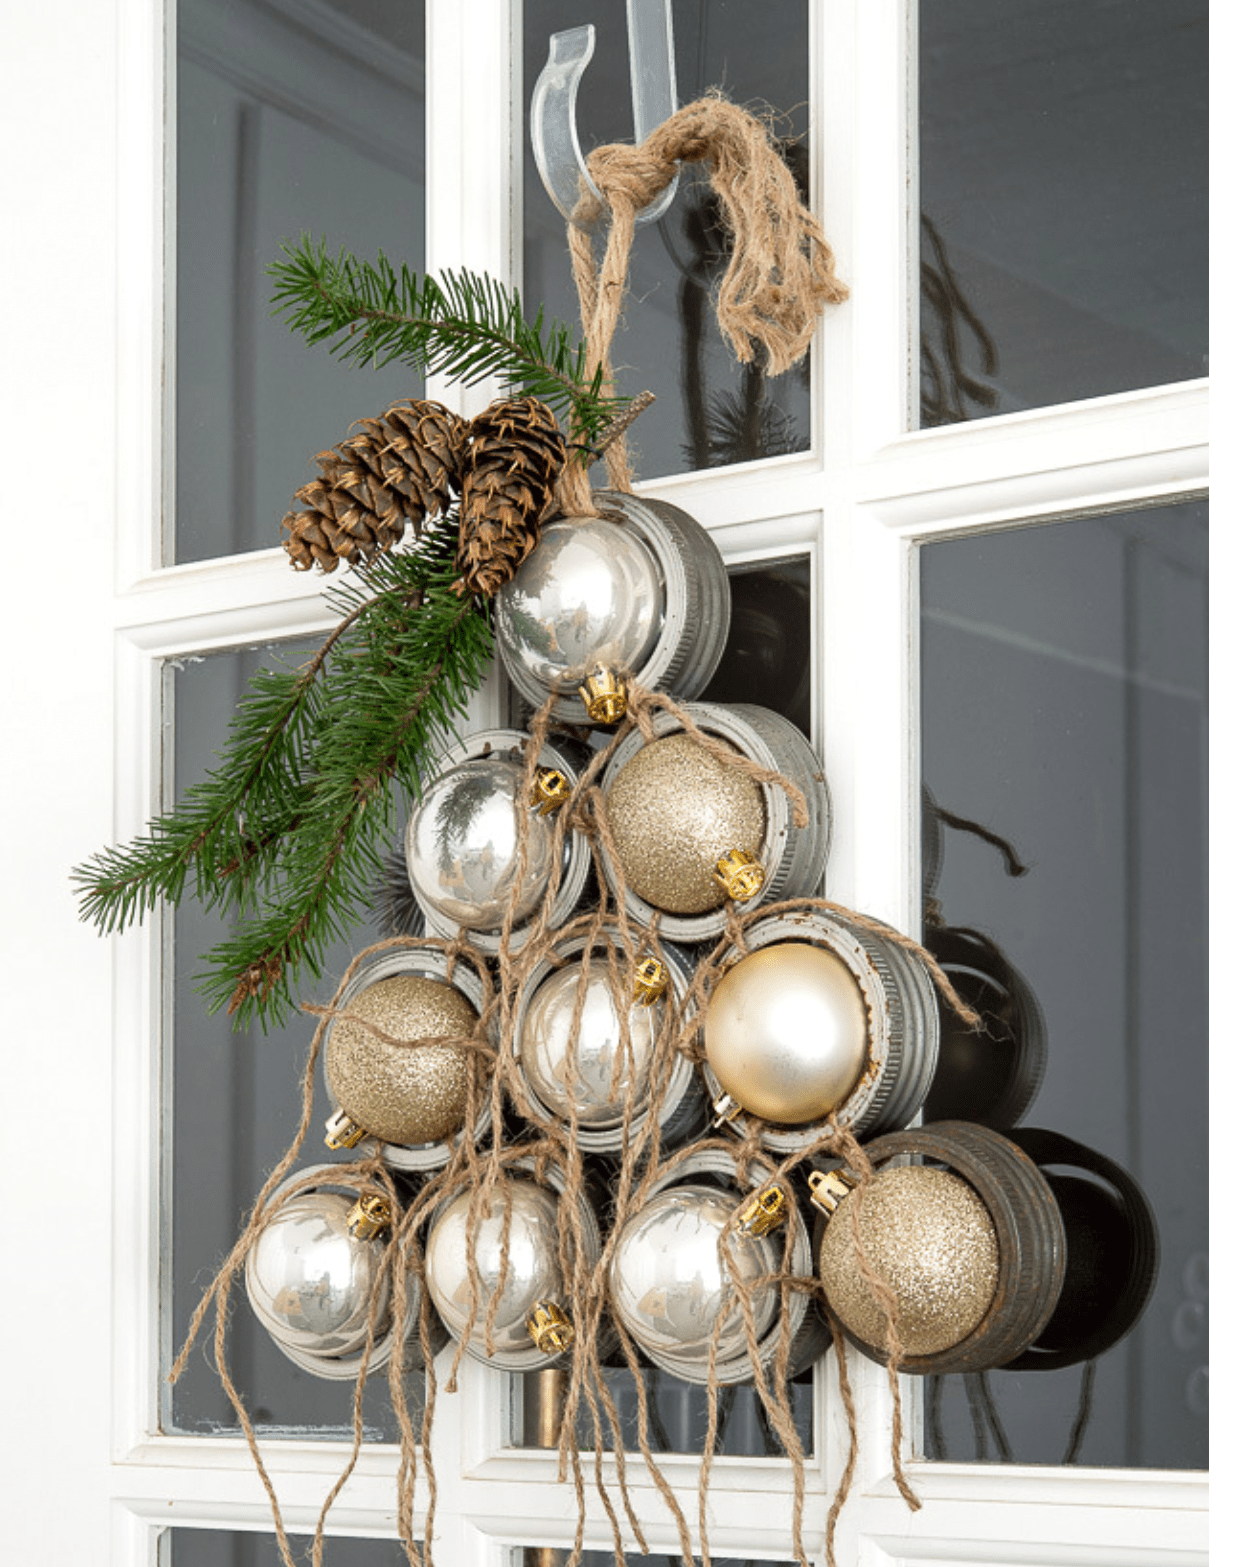
A door is just a door until you hang a tree on it. This DIY recycled metal lid Christmas tree turns an outdoor entry into a rustic focal point using silver and gold lids stacked into a cone shape, threaded with twine, and accented with small glass ornaments and sprigs of pine. The whole thing hangs flat against the door, so it doesn’t block the swing or catch the wind. Daylight shows off the metallic mix without glare, which is exactly what you want for a piece that lives outside.
The layout here is the smart part: using vertical door space instead of a table or floor keeps the entry clear and makes the tree visible from across the porch. The metal lids are sturdy enough to hold their shape through a week of weather, and the twine wrap adds enough grip to keep ornaments from sliding. If you want to swap colors next year, just paint the lids before assembly.
Create a Sparkling Diamond Painting Reindeer Artwork
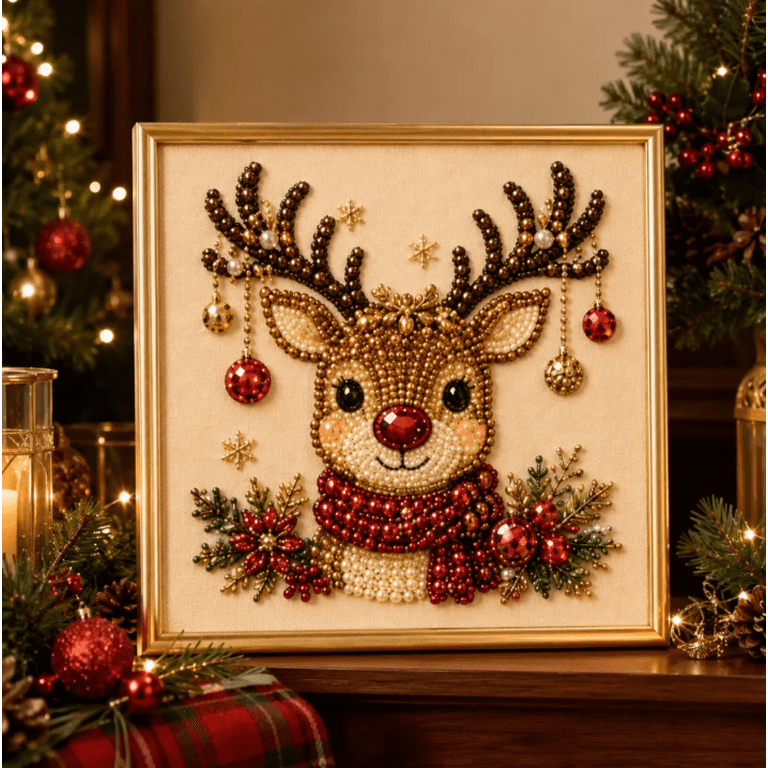
Your first reaction to a diamond painting kit might be skepticism, but the finished piece has a way of winning you over. This DIY diamond painting Christmas art features a reindeer motif built from tiny pearls and beads in gold, red, brown, and green, all set on a compact canvas that fits neatly into a standard frame. The real cost is chair time: placing each bead takes patience, and warm evening light helps you see the color shifts without straining. Once framed, the metallic thread accents catch the light from across the room, giving the wall a subtle sparkle that feels more curated than crafty.
Build a Natural Greenery Christmas Tree for Your Porch
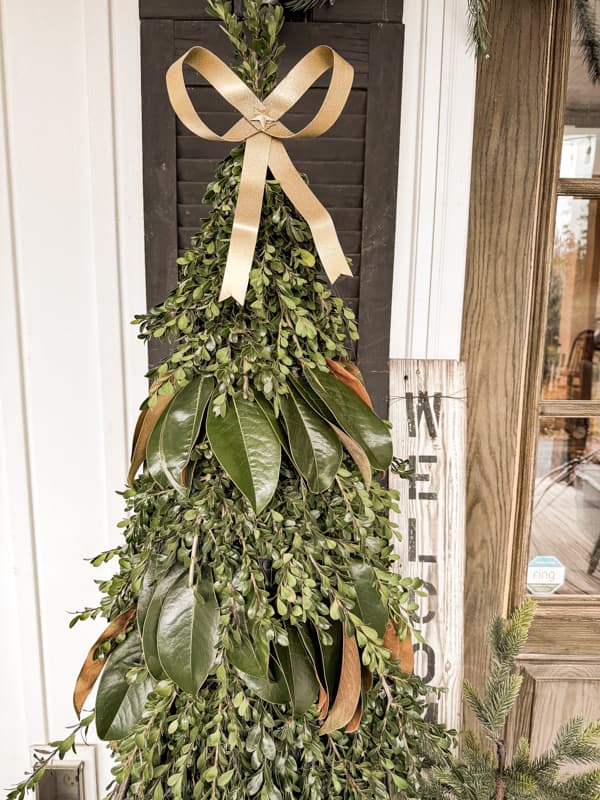
This is the kind of Christmas tree that belongs on a porch. The DIY natural greenery Christmas tree uses boxwood and magnolia leaves wired into a cone shape, topped with a gold ribbon bow, and set beside a wooden welcome sign. The palette is all green, brown, and gold, which reads as farmhouse without trying too hard. Daylight is the only light it needs, because natural greenery looks best in the open air where it can catch the sun and shadow. The magnolia leaves hold their gloss for weeks, and the boxwood keeps its shape even when temperatures dip, so this tree earns its seasonal spot without demanding daily fuss.
Design a Minimalist Pine Branch Wall Hanging
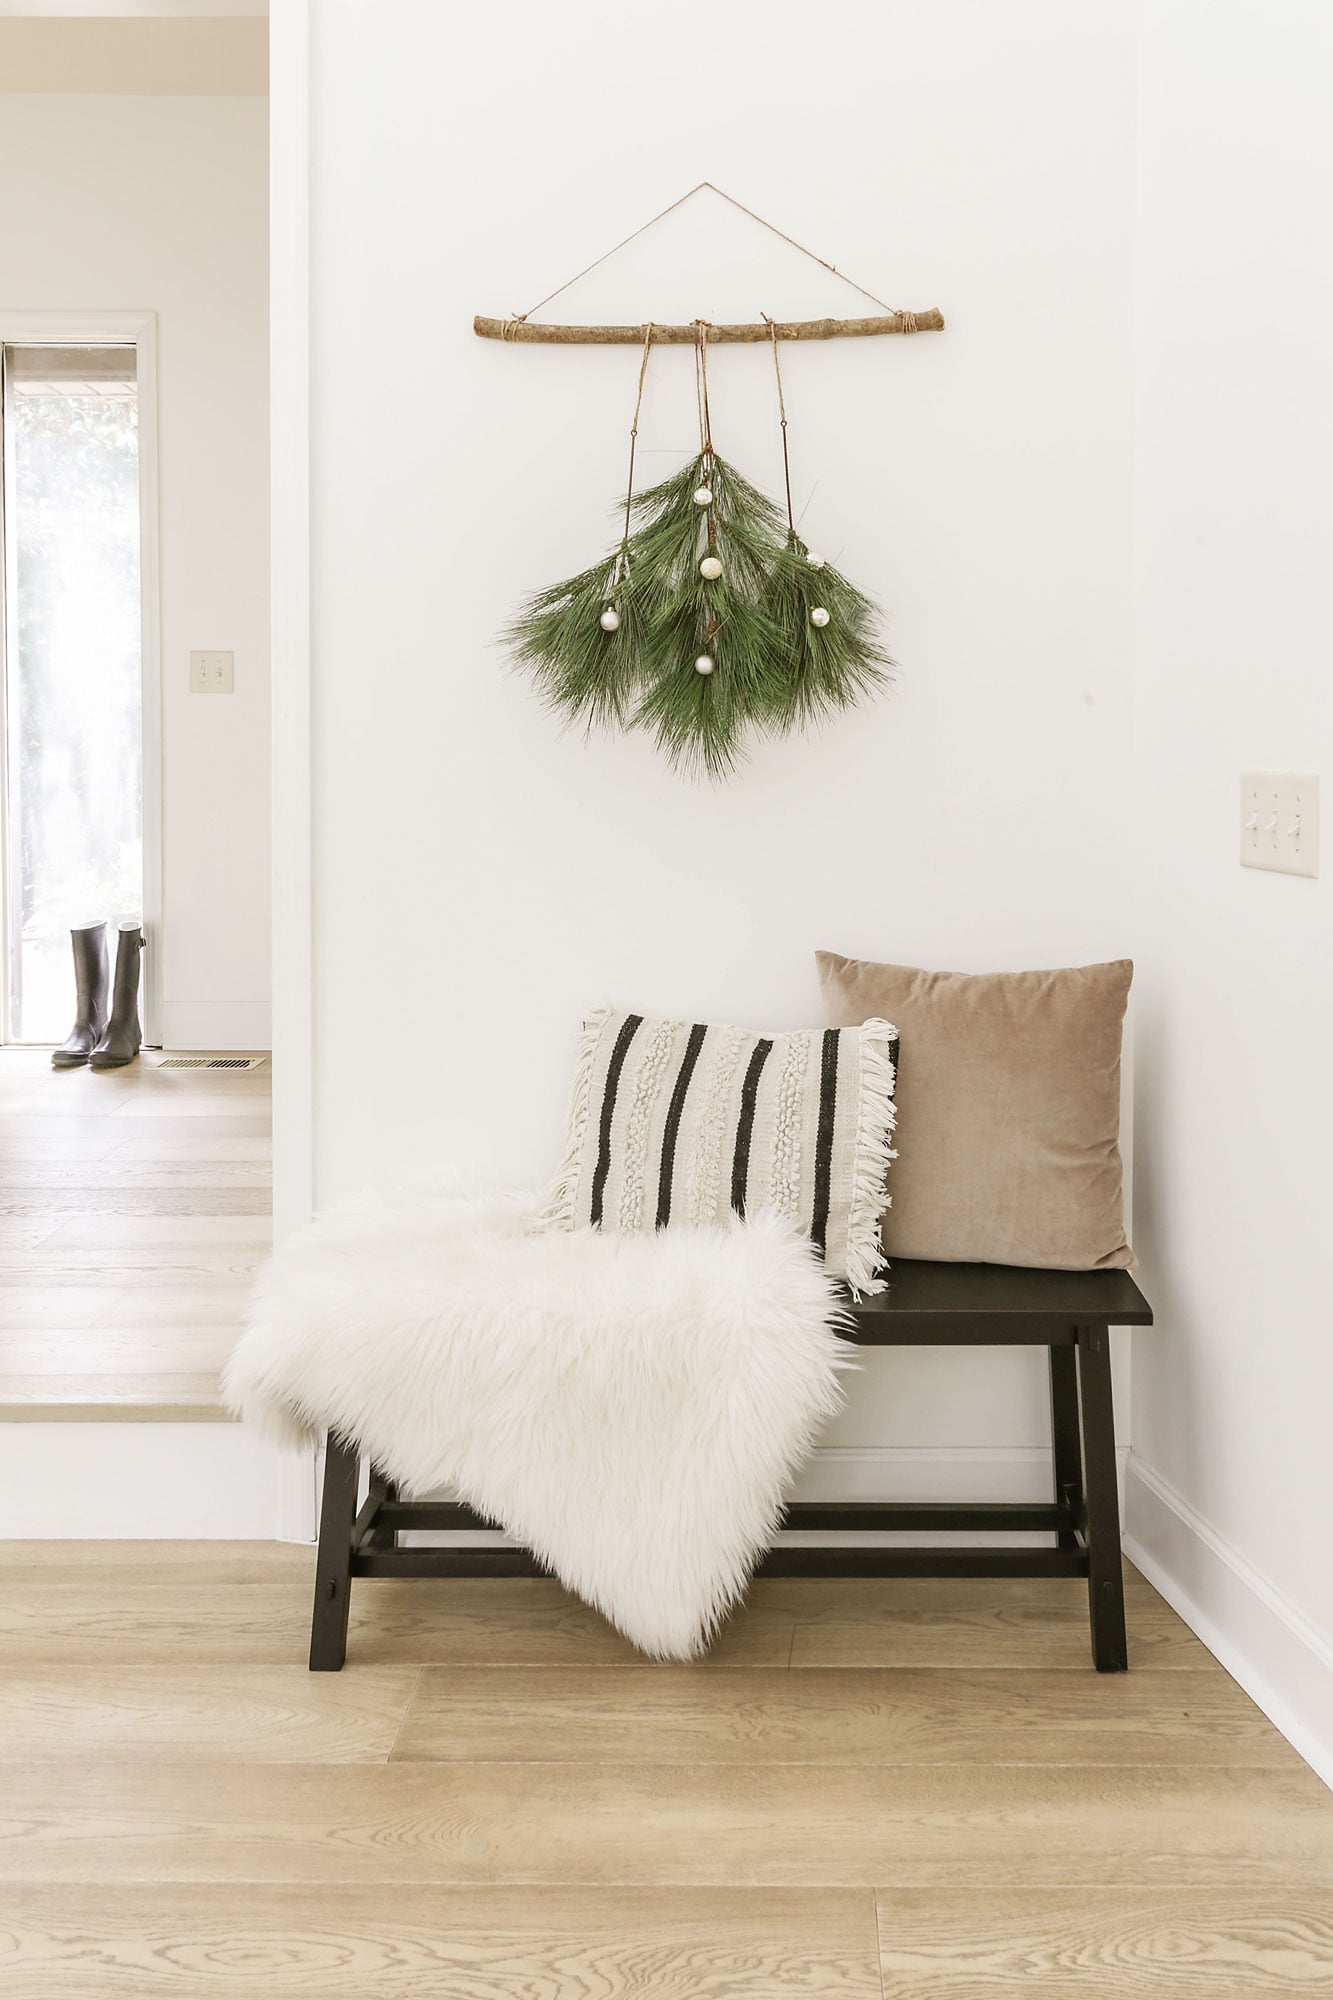
The trick is in the suspension. This DIY minimalist Christmas wall hanging uses a simple wood frame with pine branches threaded through fabric loops, holding small white ornaments at even intervals. The whole piece hangs above a bench in an entryway, where natural light from a nearby window hits the needles without overwhelming the pale beige wall behind it.
The technique matters because the branches need to stay put without visible wire or glue. Tying each branch with a thin fabric strip to the wood frame keeps the look clean and lets you swap out the pine when it dries. The white ornaments break up the green just enough to read as festive without clutter, and the wide room shot shows how the hanging anchors the bench area without competing with coats or shoes.
Sew Adorable Plaid Plush Reindeer Figures

Have you ever wanted a reindeer that doesn’t take up floor space? These DIY plaid Christmas reindeer figures are sewn from red and black plaid fabric, with wooden legs and a tiny red scarf, and they sit compactly on a shelf where daylight shows off the pattern. The sewing is straightforward: cut two body shapes, stitch them inside out, stuff, and attach the legs with a bit of glue or a tight stitch. The plaid does the heavy lifting for the rustic look, and the wooden legs keep them from tipping over. Their small size means they store easily in a bin after the season, which is the kind of storage win that makes a project worth repeating.
Decorate Whimsical Pine Cone Christmas Characters

I’ll admit I was skeptical about pine cone crafts—too many glue-gun disasters in my past. But these little characters won me over. Using natural brown cones as the base, each one gets a distinct personality: a reindeer with felt antlers, a Santa with a red pom-pom hat, an elf in green, and a snowman with a bell. The palette stays earthy with pops of red, green, blue, and yellow, and the felt, pom-poms, and fabric add texture without looking fussy. They work best grouped on a tabletop or mantel, where the whimsy feels intentional, not cluttered. For a cohesive look, stick to one material family—felt and fabric, not plastic—so the natural cone remains the hero. 24 DIY pine cone Christmas characters that actually charm.
Craft a Festive Santa Claus Ribbon Ornament
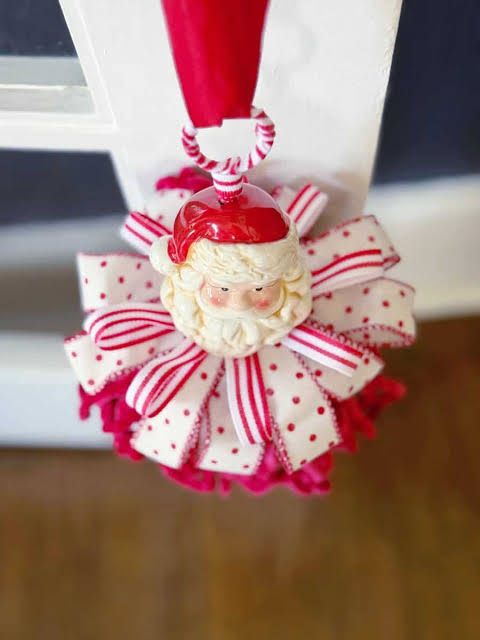
A Santa ornament hangs in a doorway, and you notice the face first. The ribbon forms a full red-and-white striped beard, with a cream ceramic face peeking out from the center. A polka dot ribbon skirt flares below, adding movement and a playful contrast to the structured top. The palette stays tight: red, white, cream—no extra colors to dilute the Santa silhouette.
What makes this ornament work is the balance between the ribbon volume and the flat ceramic face. The ribbon skirt is gathered enough to feel full but not so bulky that it hides the face. Hang it where it can spin, so the skirt catches light and the polka dots become visible. This DIY Santa Claus Christmas ornament reads as traditional but feels fresh because the ribbon does the heavy lifting—no paint, no glue mess.
Build a Rustic Reclaimed Wood Christmas Tree
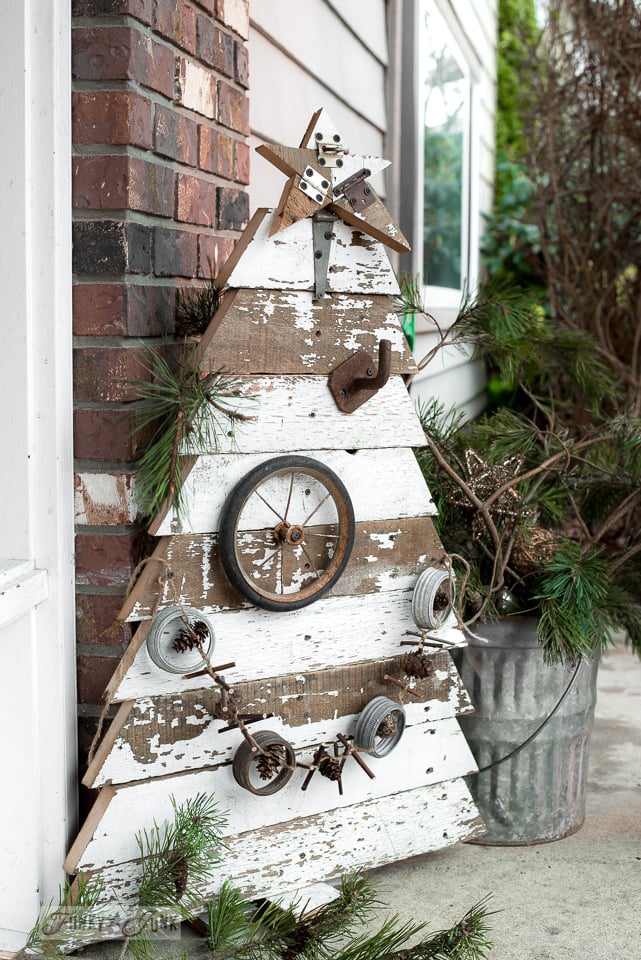
My first thought when I saw this tree was that someone raided a barn and a hardware store in the best way. The reclaimed wood planks are cut into graduated tiers and stacked to form a tree shape, with a metal wheel as the base and a simple star topper. The finish is distressed—white and brown wood showing through—and small pine cone ornaments hang from the planks. It sits on a porch against a brick wall, and the daylight softens the rough edges. This DIY reclaimed wood Christmas tree is compact enough for a small outdoor corner but sturdy enough to handle wind. The metal wheel keeps it grounded, literally and visually.
Adorn Your Tree with Fabric Hoop Ornaments
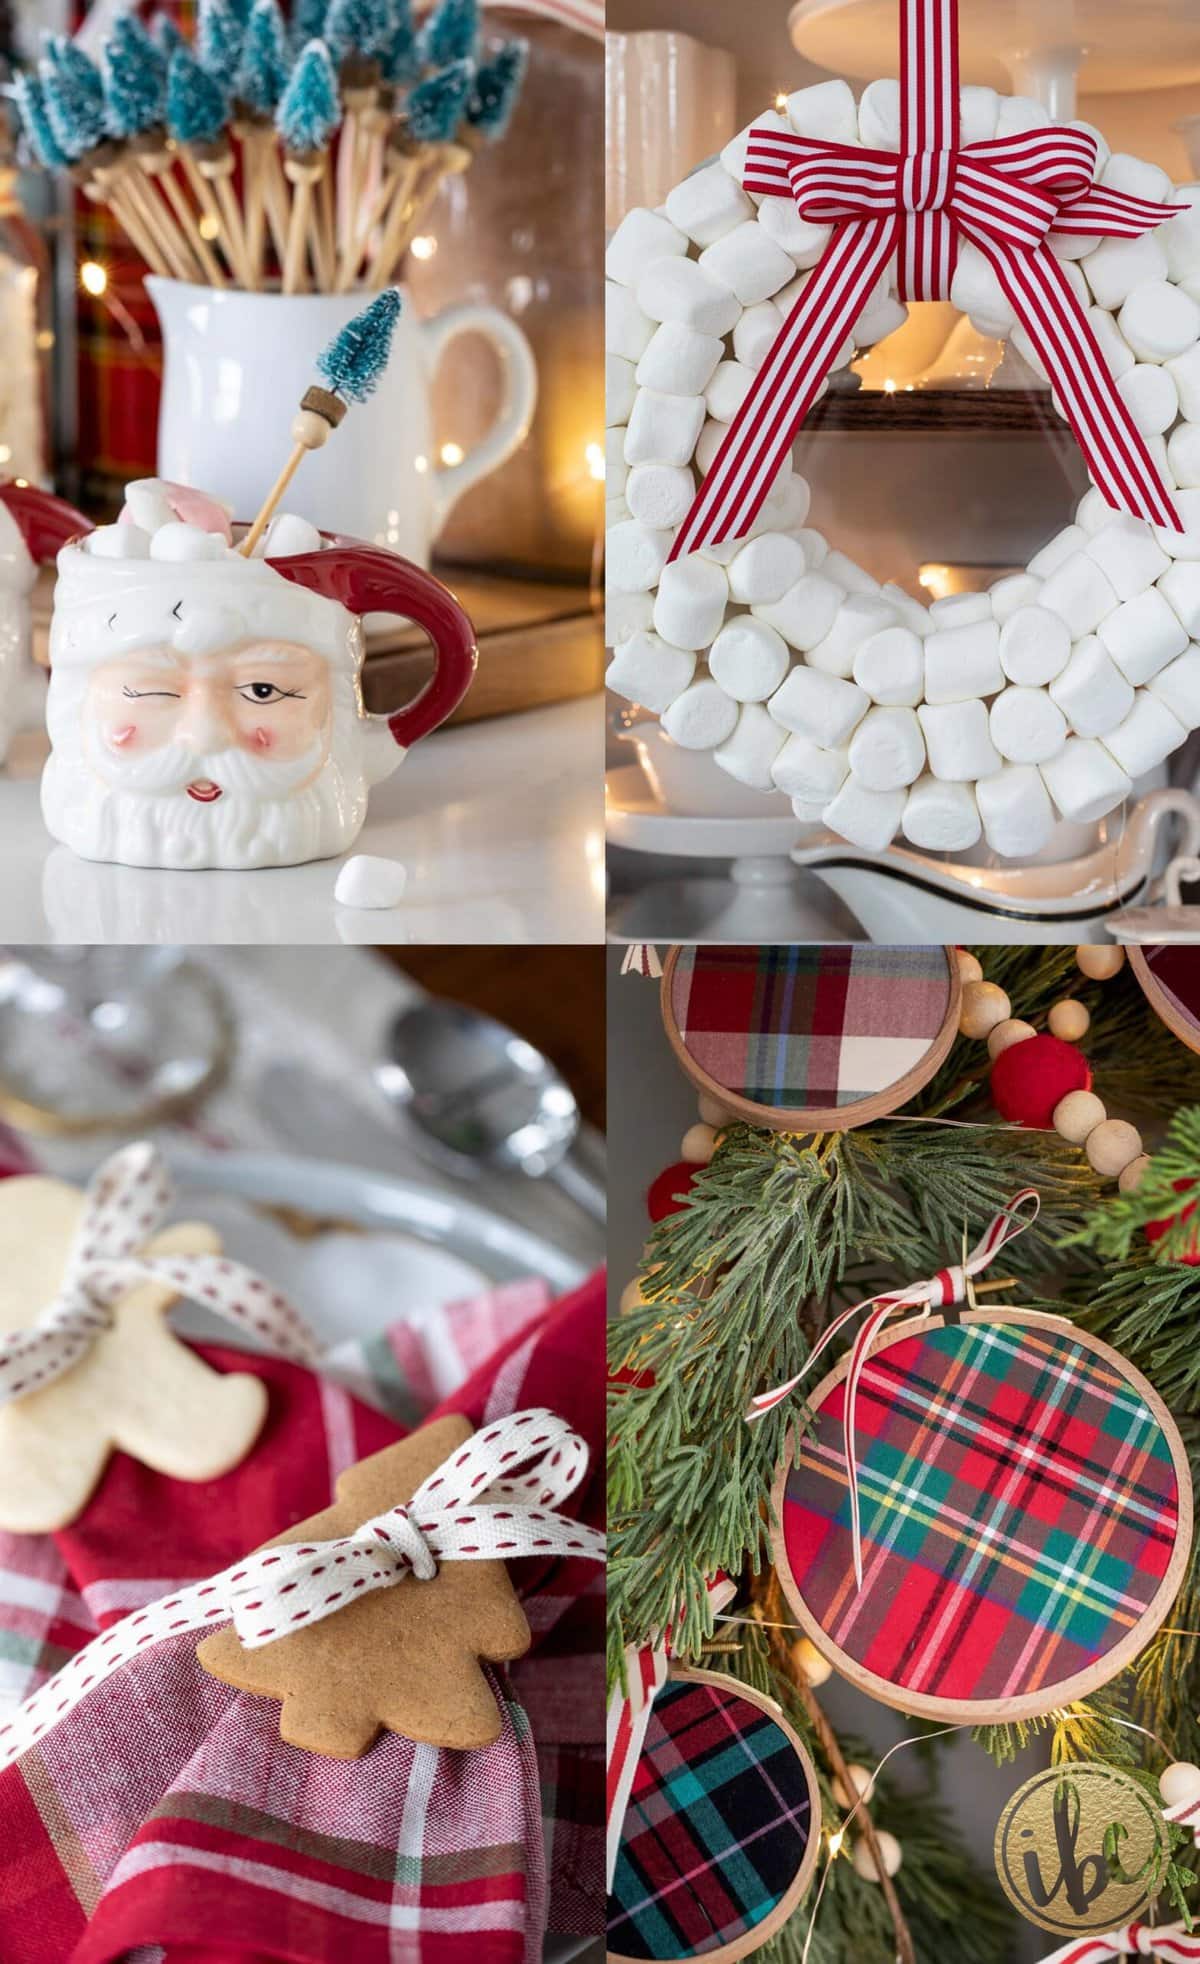
The mistake most people make with fabric hoop ornaments is using fabric that’s too thick or too busy. These work because the plaid is classic red and green, and the hoop is left as natural wood—no paint. The fabric wraps snugly around the inner hoop, and a small sprig of greenery tucks behind the knot. The result reads as farmhouse, not crafty. They hang on a kitchen tree near a Santa mug and marshmallow wreath, but the real trick is scale: keep the hoop size consistent so the ornaments read as a set, not a collection of leftovers. For a renter-safe swap, use command hooks on the tree branches instead of wire hooks that can scratch. 24 DIY fabric hoop Christmas ornaments that avoid the common pitfalls.
Paint Modern Abstract Christmas Ornaments
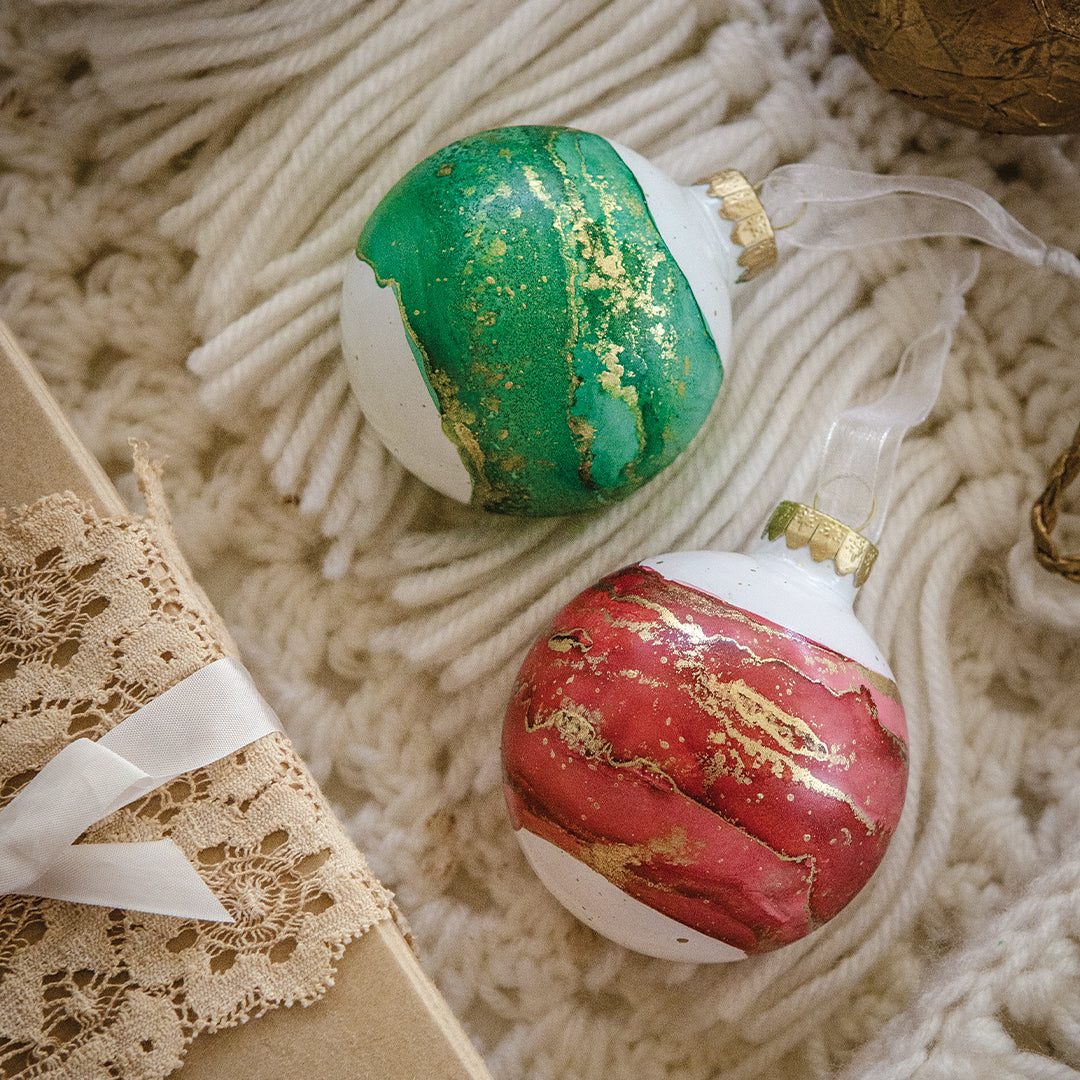
Compared to traditional hand-painted ornaments with detailed scenes, these abstract versions feel like a breath of fresh air. The palette is white, green, red, and gold, but the paint is applied in loose strokes and splatters—no perfect lines. The ornaments are glass, so the paint sits on the surface rather than soaking in, which means you can layer colors without muddling them. A textured blanket underneath adds contrast, but the real trick is leaving negative space: let the glass show through between color blocks.
What makes this approach smarter than detailed painting is that mistakes become part of the design. A drip becomes a deliberate accent. Gold paint applied as a final touch catches light and ties the set together. These DIY painted Christmas ornaments work best on a modern tree with minimal other decor, where the abstract shapes can stand out without competing.
Create a Rustic Outdoor Planter Arrangement

Have you got a bare planter by the front door? This DIY rustic Christmas planter decor is a genuine win for anyone with a covered entry and a desire for instant curb appeal. Layer birch logs for height, pine branches for fullness, pinecones for texture, and top with a large deep red velvet bow. It suits the gardener who already has clippers and a stash of natural materials. Skip it if your porch is exposed to heavy rain or strong winds, or if you prefer a low-maintenance alternative like a pre-made evergreen wreath. As a decor principle, layering heights creates visual interest and helps each element stand out without looking crowded.
Display a Large Tiered Wooden Christmas Tree
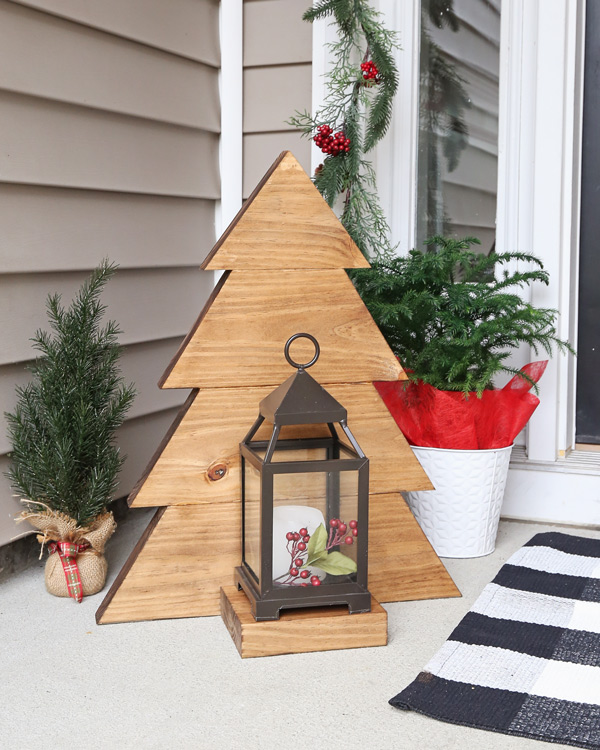
I’ll admit I had my doubts about a large wooden tree as a porch decoration. But this tiered version, set against natural wood, green, red, black and white accents, actually anchors the space without feeling clunky. The tiers step up neatly, painted in a mix of colors that tie into the farmhouse vibe. It works as a focal point because the scale fits the compact corner. A lantern and potted evergreens frame it, and a rug underneath defines the vignette. The daylight makes the wood grain and painted details pop. For a DIY wooden Christmas tree decoration, this setup shows how a single crafted piece can hold its own outdoors when surrounded by simple, complementary elements. It’s not overly decorated, which helps it feel intentional rather than forced.
Assemble an Evergreen and Orange Table Centerpiece

Gather some evergreen clippings from the yard and reach for the oranges. This is one of those centerpieces that looks like it took hours but actually comes together in minutes. The investment is mostly in the foraging and slicing, not in store-bought decor. A circular arrangement of pine, holly, and dried orange rings sits on the table, with a single LED candle in the center for scale. Fairy lights woven through the greens add a soft, warm glow that makes the gold and white tones stand out. The result is a natural table centerpiece that feels generous without a heavy price tag.
This DIY natural Christmas table centerpiece proves that nature and thrift can be elegant. The dried oranges catch the light, and the holly adds that traditional red pop. Since it relies on fresh clippings, the scent adds to the experience. It also means the arrangement has a limited lifespan, which encourages you to enjoy it fully while it lasts. The simplicity keeps the focus on the table itself, making it a welcoming spot for a casual meal or a festive gathering.
Hang a Delicate Paper Doily Ornament
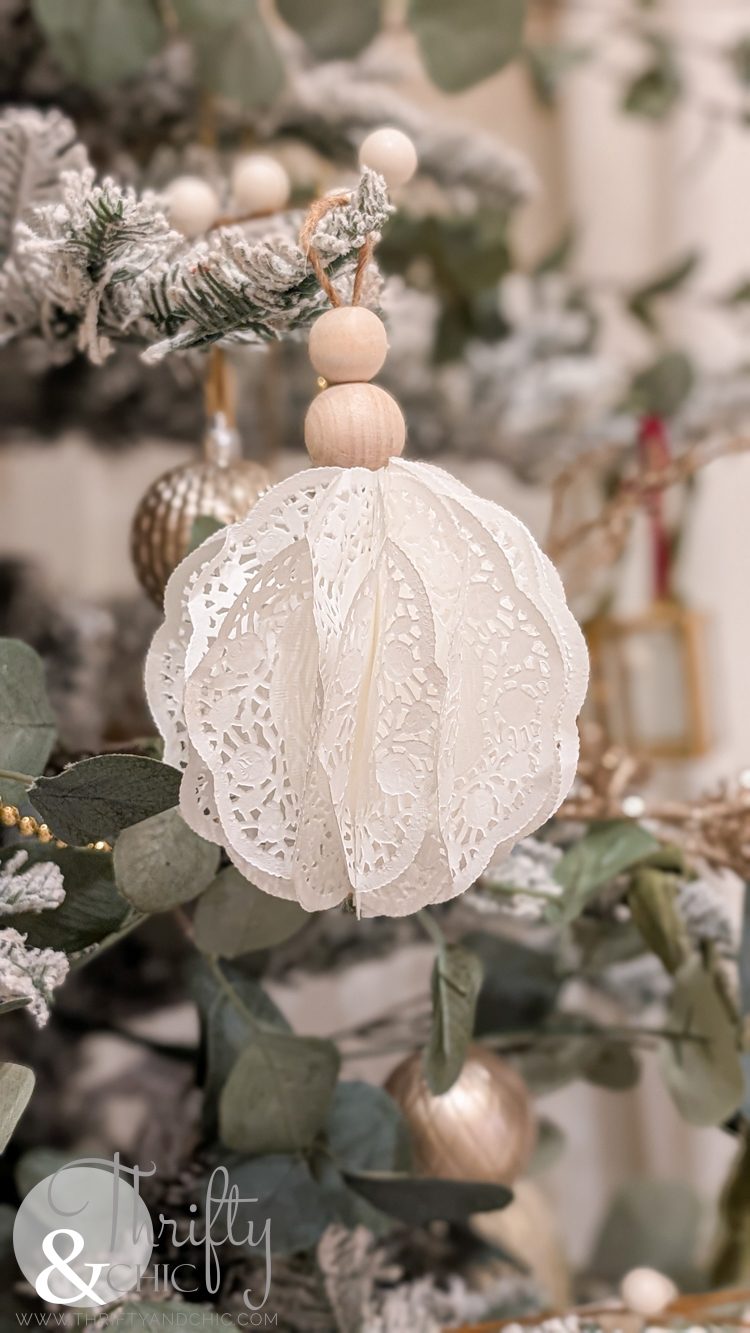
There’s something about a paper doily ornament that feels instantly nostalgic, like a handmade holiday from childhood. This version uses a layered doily with intricate cutouts, hung from a simple wooden bead chain. The white against the wood tones and soft green of a flocked branch evokes a cottage holiday. It lands so well in this season because it captures the delicate, handcrafted spirit that mass-produced ornaments can’t replicate. It hangs lightly, adding texture without bulk.
Paint Folk Art Wooden Christmas Blocks

These DIY hand-painted Christmas wood blocks deliver exactly what folk art promises: charm that comes from imperfection. The technique is simple: paint compact wooden blocks with motifs like trees, snowmen, and snowflakes using a palette of brown, green, white, red, and black. A close-up of a hand-painted Christmas tree reveals the beauty of imperfect brushstrokes, which give each block its own personality. Scatter the blocks across a table for a casual layout that invites hands-on interaction and allows the warm wood tones to ground the bright colors. The warm artificial light and soft bokeh background enhance the cozy, handmade feel, making these blocks perfect for a living room side table or a kitchen counter. This project is all about embracing the handmade look, so precision is not the goal.
Craft Rustic Kraft Paper Christmas Stars
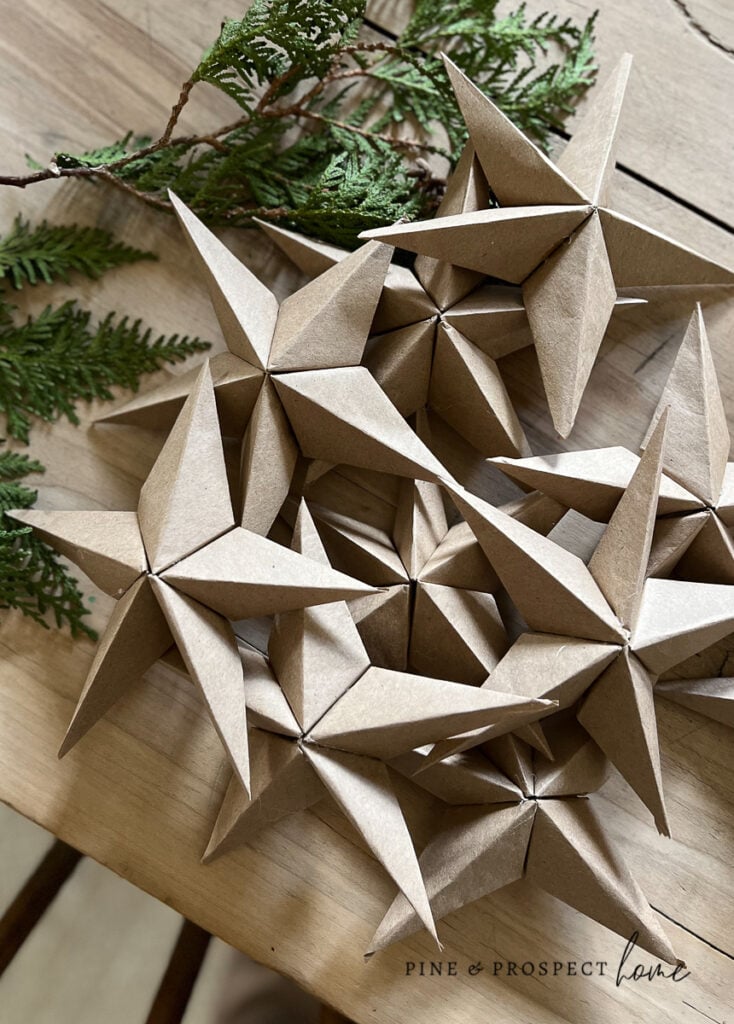
Kraft paper folded into a geometric star holds its shape better than you’d expect. The brown paper catches natural daylight without glare, so the stars land somewhere between handmade and heirloom. Scatter them across a table with evergreen sprigs for a look that feels gathered rather than arranged. Keep the space around them simple — a wood surface and a few branches are enough. The stars become the hero, and the room fades into background.
For a rustic accent that doesn’t demand a full tablescape, this fits. The paper is forgiving, so if a fold goes wrong you just start over. Pair these with your existing wood tones and any greens you have on hand. The whole point is that the materials are humble, and the result looks intentional. That is the trick to easy DIY kraft paper Christmas stars that actually get complimented.
Create Minimalist Paper Honeycomb Ornaments
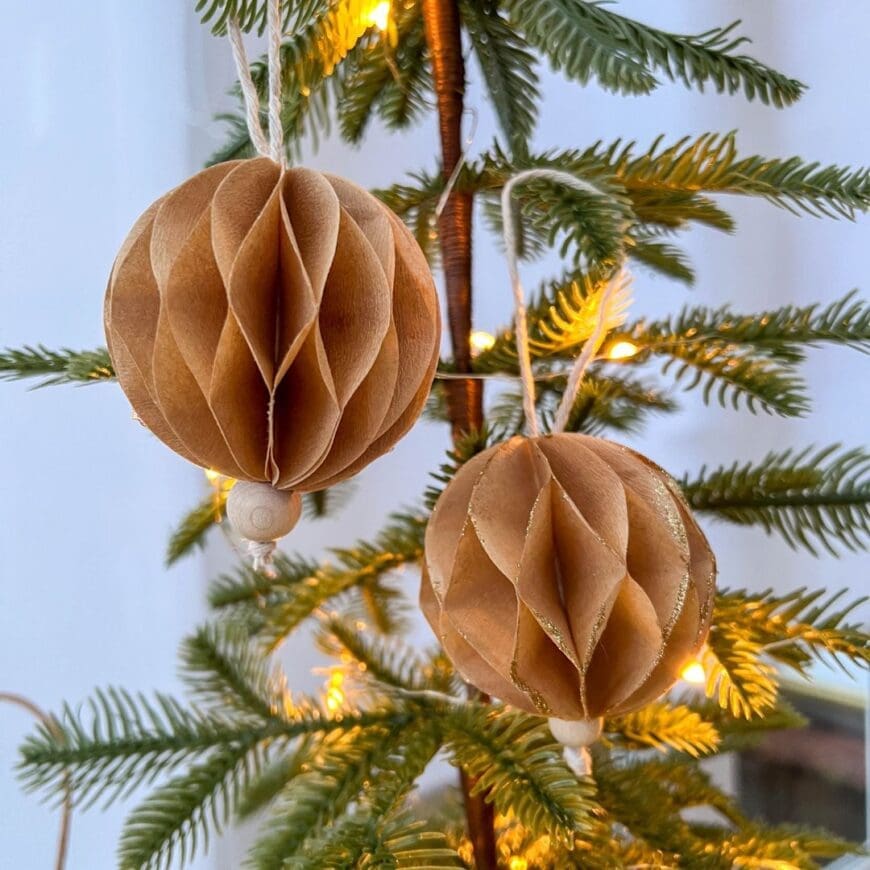
Can a folded paper ornament really feel like more than a school project? With the right proportions and a gold bead at the base, these honeycomb shapes pull it off. The brown paper gives warmth against the tree’s green, and a touch of glitter catches the fairy lights without shouting. But the folding takes patience — each pleat has to line up or the whole thing sags. For a minimalist tree that wants texture over color, these earn their spot. Just be ready to spend an evening with a bone folder. That is the trade-off for DIY paper honeycomb Christmas ornaments that look this delicate.
Design Festive Felt Christmas Coffee Cup Sleeves

I will admit I am a sucker for a craft that earns its keep between December 1 and New Year’s morning. This felt reindeer sleeve does exactly that. The red felt forms the body, the brown antlers curve up from the top, and a tiny white circle becomes the nose. It wraps a standard disposable cup and stays put because the felt grabs the cardboard. The look works outdoors too — the reindeer silhouette reads clearly from a few feet away, which matters when you are holding coffee and fumbling with keys. These sleeves make a practical gift that keeps hands warm and tables festive. The whole design hinges on that one reindeer shape being instantly recognizable.
Style a Cozy Living Room with a Decorated Christmas Tree

The tree is up, the lights are on, and suddenly the room feels different. That is the moment I remember why I drag the boxes down from the attic every year. In this corner setup, the tree anchors the room while a large knit blanket drapes over the sofa in beige and cream. A shell-shaped candle holder on the coffee table echoes the warm glow. The palette stays natural — green from the tree, white and beige from the textiles, brown from the wood furniture.
The room feels roomy because nothing competes. The knit blanket adds texture without pattern, and the candle holder introduces a soft curve among all the straight lines. This is cozy DIY Christmas living room decor that relies on what is already there: a tree, a throw, a candle. No need to overstuff the space. The quiet arrangement lets you actually sit down and enjoy it.
Final Thoughts
From rustic pinecone creations to delicate paper ornaments, these DIY Christmas decor projects prove that the best holiday decorations often come from your own hands. The common thread is simplicity: using natural materials, repurposing everyday items, and focusing on a few key details. Whether you spend an afternoon on a single centerpiece or dedicate a weekend to several projects, each piece adds a layer of warmth and personality to your home. Let this collection inspire you to embrace the joy of making, and remember that the true spirit of the season is found in the moments you create, not in the price tag. Happy crafting, and may your home be filled with the glow of handmade cheer.